
Hi Friends
Hope this festive season bought tons of happiness and blessings to your life. And now as these days are gone we are back to business. Windows Server 2016 is already in market and has lot of interesting new feature. One of these much-talked new feature of Server 2016 is Nano server. So, in this post we will talk about Nano server.
Introduction
There are three installation option in Windows Server 2016 as below :
1. Windows Server 2016 (Desktop Experience) – This is a full server installation and includes a complete graphical user interface. This installation option supports all Windows Server roles.
2. Windows Server 2016 – This is the equivalent of Server Core in earlier versions of Windows Server and provides only command-line management interface. This installation option has a reduced hardware requirement but does not support all Windows Server roles. To remind you, server core was introduced in Windows server 2008.
3. Nano Server – This is a new installation option for Windows Server 2016. It has no GUI at all. Nano Server is administered remotely and optimized for hosting in private clouds and datacenters. There are only few roles and features available on Nano server so the main advantage of Nano server is lower hardware requirement,less number of patches, lesser reboots and less attack surface.
Roles and features supported on Nano Server
Some of the roles and features supported on Nano server are as under:
- Hyper-V role
- Failover Clustering
- File Server role
- DNS Server role
- IIS
- Host support for Windows Containers
Installation of Nano Server
Nano Server is not available for selection through the Windows Server 2016 setup wizard. Instead, you must create a virtual hard drive by using Windows PowerShell. You can then use this virtual hard drive on a virtual machine or on a physical machine for Nano Server deployment. The files required for setting up Nano Server are located in the “NanoServer” folder located on the Windows Server 2016 Installation media.
The steps to deploy Nano server are as under:
1. Copy the NanoServerImageGenerator folder from the NanoServer folder on the Windows Server 2016 installation media to a folder on your local machine so that you may use it further.
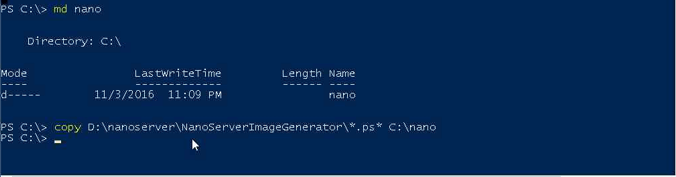
2. Start Windows PowerShell as an administrator and change the directory to the NanoServerImageGenerator folder on your local drive.
3. Import the NanoServerImageGenerator module by using the following Windows PowerShell Import-Module cmdlet:
Import-Module .\NanoServerImageGenerator -Verbose
4. Create the VHD or WIM by using the New-NanoServerImage cmdlet with the following syntax:
New-NanoServerImage -Edition <edition> -DeploymentType <deployment type> -MediaPath <media path> -BasePath <base path> -TargetPath <target path> -ComputerName <computername> -Packages <packages> -<other package switches>
where:
Edition is the Windows Server 2016 edition the Nano Server will be based on; either Standard or Datacenter.
Deployment type is the type of deployment; Host for WIM or bootable VHD, Guest for VHDs hosted in Hyper-V.
Media path is the path to the root of the Windows Server 2016 installation media.
Base path is a optional switch is used when creating a WIM file. When creating a WIM file, the Nano Server binaries will be copied to this folder so that the New-NanoServerWim cmdlet can be used to create a new image without specifying the -MediaPath switch.
Target path is the path and file name, including extension, of the Nano Server Image. The file type created depends on the file extension specified: .vhd for a Generation 1 virtual machine, .vhdx for a Generation virtual machine, and .wim for a WIM file.
Computer name is the name of the target Nano Server computer.
Packages is used to install certain roles and features if you want to install any of them. Multiple packages can be combined in a comma-separated list.
Other package switches is used for those package which has its own switches.If you want to deploy a Nano Server to a physical machine, be sure to use the -OEMDrivers switch to install the basic set of device drivers that are included in the Standard edition installation.
The Windows PowerShell script prompts you for an administrator account and password when it is run.

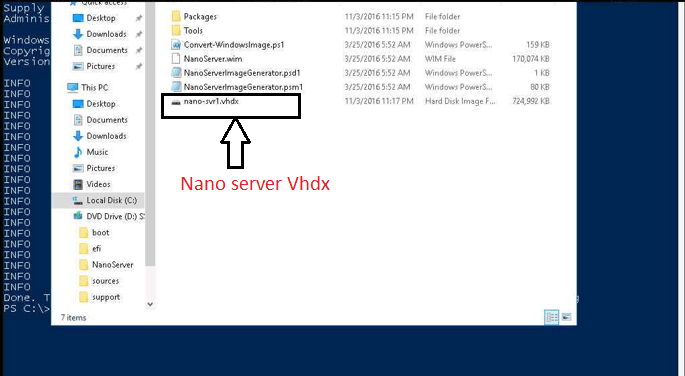
Once you run this command it will create Virtual Hard Disk which you can use on Virtual Machine, Physical Machine or even with WDS.
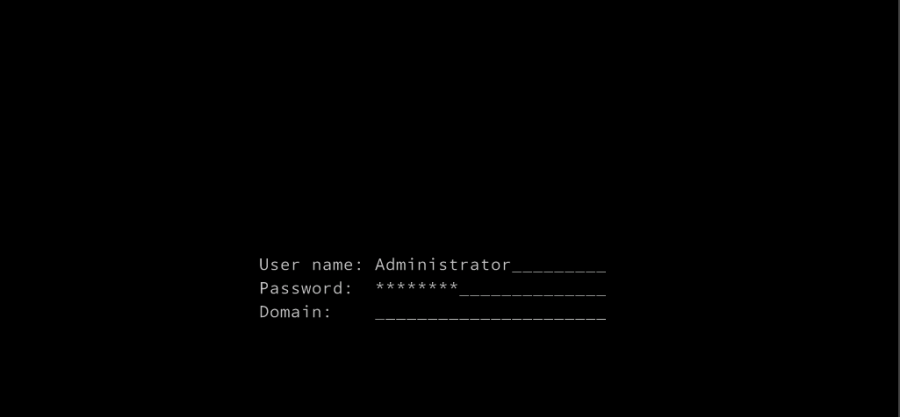
So, this is how you install Nano server. Once you have configured you Nano server its look and feel is different from other Windows server.
This is how logon Screen of Nano Server looks like:
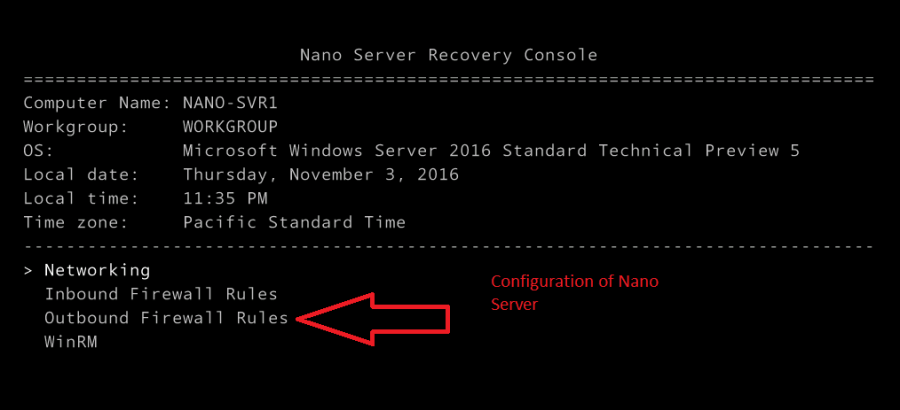
Most of the Nano server administration need to be done remotely. However, you can do few settings like IP configuration, Firewall configuration etc locally. Below is how this window looks like.
Ok, so this is how you can configure your Nano server. Are you anxious to check it by yourself ? Here is the link you can use to download Windows 2016 server for evaluation:
microsoft.com/…/evaluate-windows-server-2016
That’s all in this post. Hope you found it informative. See you soon with some other technical stuff. Till then take good care of yourself. Bye. 🙂
